How to Record Data from External Applications with SightLab VR

October 28, 2025

Watch this YouTube video demonstrating the External Application Data Recorder:

https://www.youtube.com/watch?v=j63jZA9kPZI

Overview

The External Application Data Recorder enables you to record, save, and synchronize eye and sensor data while running external VR applications, including SteamVR games, Oculus apps, web-based VR experiences, or stand-alone/Android based applications (Note: stand alone doesn't include eye tracking). After a session you can run the replay and view the gaze point synchronized with the data. There is an experimental mode to use AI to look for view counts.

At‑a‑Glance

  • Platforms: Unreal, Unity, SteamVR/OpenXR PC apps; desktop apps; web; standalone/Android via casting (head pose only).
  • Headsets: Vive Focus Vision, Vive Focus 3, Vive Pro Eye (use Vive Focus 3 Recorder), Meta Quest Pro / 3 / 3S / 2 (no ET on 2/3/3S), Varjo XR‑3/XR‑4, HP Omnicept, plus generic SteamVR/OpenXR (results may vary), Quest 3 w/Pupil Labs
  • Screen‑based Eyetrackers: Tobii, EyeLogic.
  • Outputs: CSV logs (gaze, fixations/saccades, events, custom markers, face tracking and much more), video with gaze overlay, Biopac AcqKnowledge markers. Replay with scan paths, fixation spheres, heatmaps. See here for full list.

Setup

Install prerequisites

  • Vizard Package Manager → CMD: install pyautogui pygetwindow mss opencv-python
  • K‑Lite Codec Pack (for playback/record): https://codecguide.com/download_kl.htm
  • SRanipal/SteamVR for Vive Focus Vision / Focus 3 / Pro Eye: install Vive Console for SteamVR.


How to Run

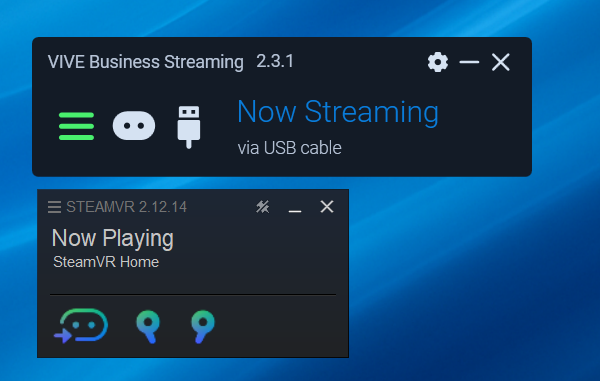
1. Setup Hardware and Launch External Application

Make sure your hardware/headset are connected and running and launch the external application you want to record data with (i.e., Unreal, Unity, SteamVR, etc.).

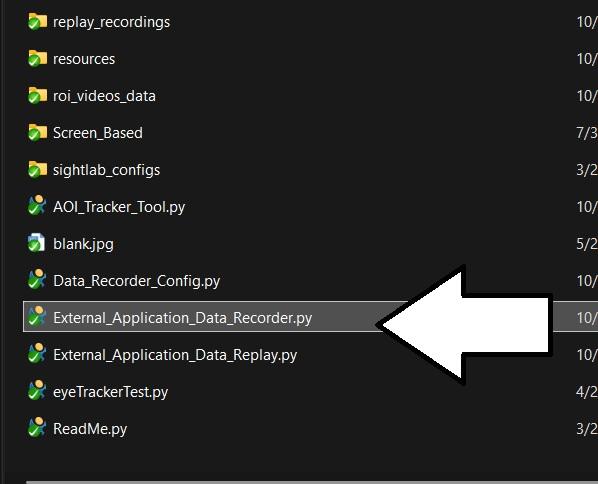
2. Launch the Recorder

Launch the External_Application_Data_Recorder.py file to get the recorder ready.

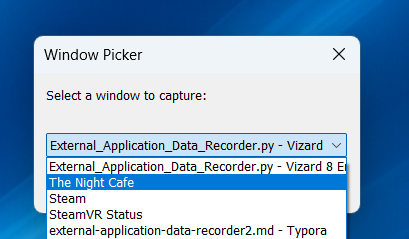
3. Choose Window Title

Choose the Window Title to capture.

4. Select Recording Length

Select recording length (seconds). You can end early by closing the window or pressing Space.

5. Choose Your Hardware

Select the hardware profile you’re using.

6. Start Recording
Put on the headset and press Spacebar (default; configurable). If connected to Biopac, AcqKnowledge transport starts. On supported HMDs you’ll see a live gaze point on the mirrored window.
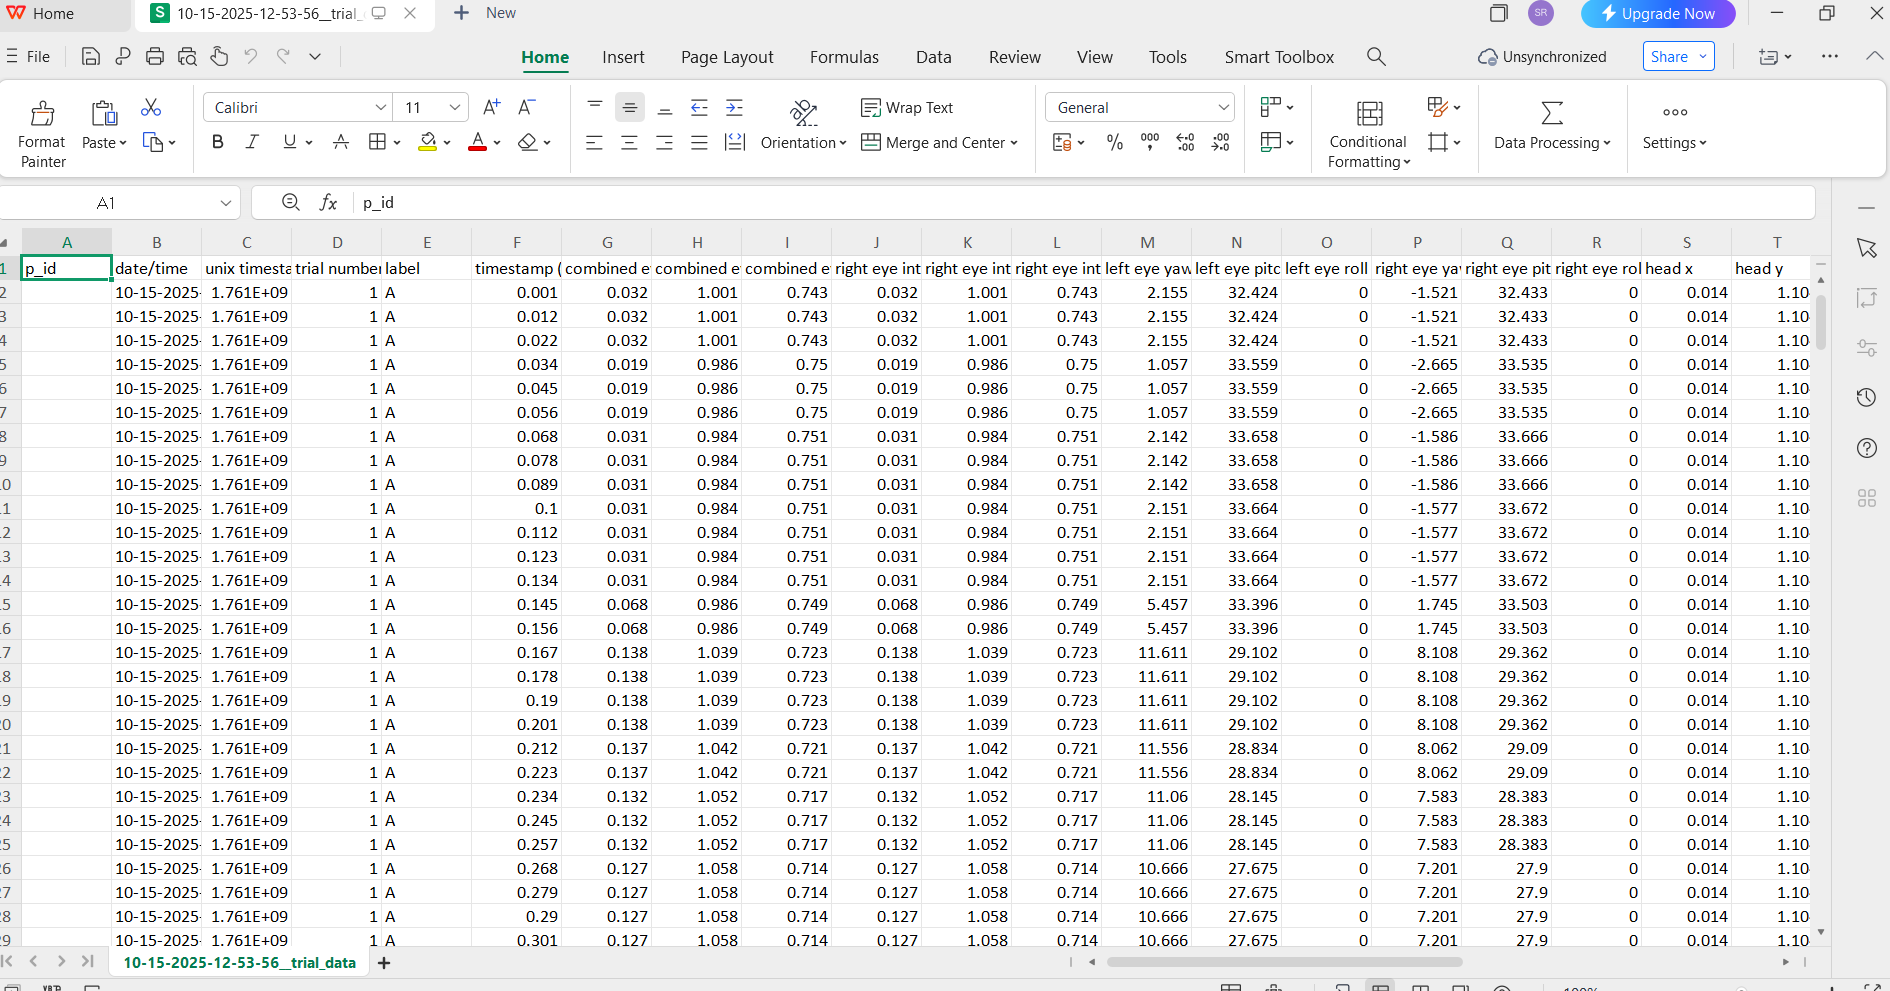
7. Finish & Save
When the timer ends you’ll hear a beep. Data goes to the /data folder.

8. Replay Your Session
View a replay with visualizations by launching the External_Application_Data_Replay.py file and choose your session. (If the replay crashes, you may need to run convert_video_to_fix.py and convert the video.)

9. Scrub Through Playback
Use the scrubber in the replay to scrub through the playback. Press the 1 and 2 keys to synchronize moving the scrubber in AcqKnowledge if using version 6.02 or higher. (See the Replay page for more information and controls.)

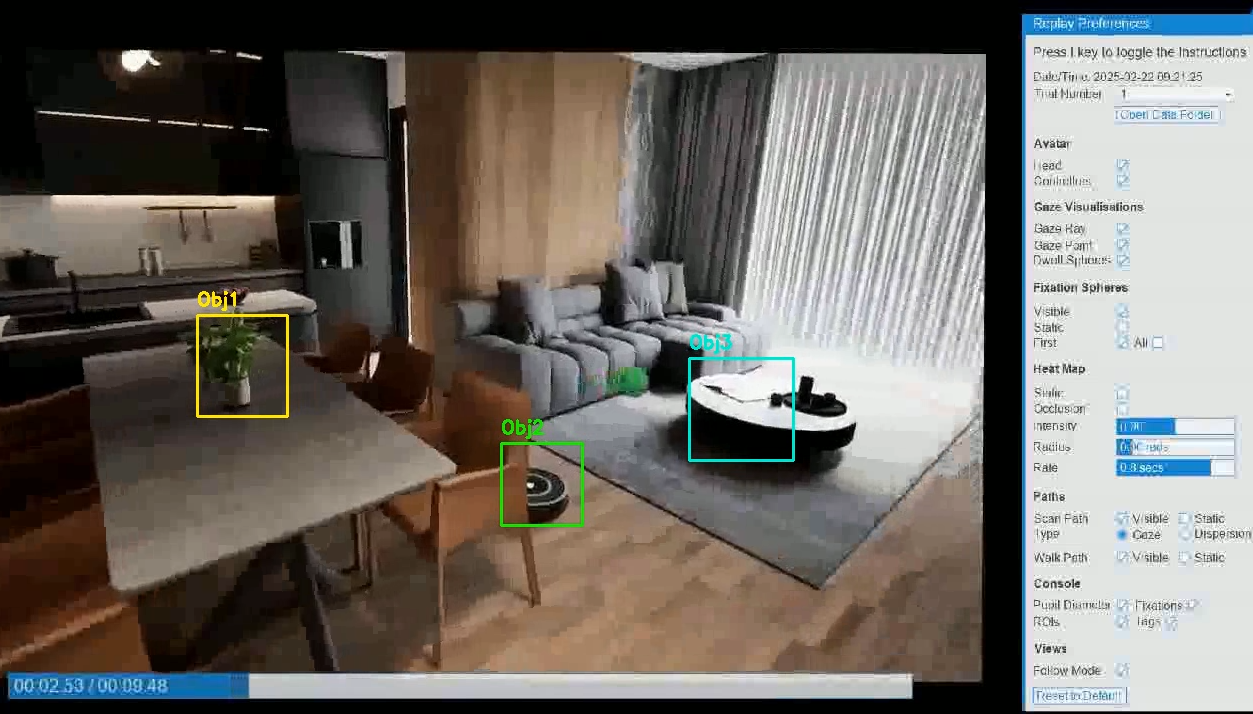
10. Toggle Visualizations
Toggle visualizations such as scan path, fixation spheres, and the heatmap in the replay. (You may need to toggle items first to see the visualizations. Visualizations other than gaze point are not available for stand-alone Android-based applications.)


11. Export Gaze-Overlay Video
Press 4 in the replay to record a video with the gaze point (plays through in real time). Press 5 to stop. This saves in the replay_recordings folder. Open the recorded video in AcqKnowledge to see synchronization with physiological data. (See sending-events-to-biopac.md for details.)


12. (Optional) Experimental AOI Tracker
Run the Experimental AOI Tracker Tool to tag objects or regions to follow (see below).


What Gets Recorded

See here for a full list.

Eye/Gaze

  • Combined & per‑eye gaze origin/rotation; gaze point overlay
  • Fixations & counts
  • Saccades (state, amplitude, velocity, peak/avg stats)
  • (Experimental) AI‑derived View Counts & Dwell

Physiology (when available)

  • Biopac AcqKnowledge Physiological Data (when connected to Biopac) (i.e. heart rate, EDA, ECG, EEG, FNIRs, Respiration)
  • Pupil diameter (Varjo, Omnicept, Vive Pro Eye, Pupil Labs)
  • Eye openness (Varjo, Omnicept, Vive Pro Eye, Vive Focus 3, Focus Vision)
  • Heart rate & cognitive load (HP Omnicept)
  • Facial expressions (Quest Pro)

Events & Timing

  • Custom flags, interaction triggers, timestamps (trial‑relative & UNIX).

Video & Sync

  • Optional screen recording (configurable method & quality)
  • Biopac AcqKnowledge markers & sync; AcqKnowledge playback can be driven by the SightLab Replay slider (6.02+)

Note: Standalone/Android via casting records head pose only; no eye vector or object intersections.

Running Standalone/Android via Casting (Meta)

  1. On the headset: Settings → Camera → Cast.
  2. On PC: open https://www.oculus.com/casting/, press F11 for fullscreen.
  3. In the Recorder, choose Stand-Alone ("Desktop" if running an older version without that option) as the hardware mode and select the browser cast window.
  4. Replay will show a virtual screen; data syncs with AcqKnowledge if connected.

Configuration Settings

# ----- Biopac & Network Sync -----

BIOPAC_ON = True                    # Communicate with Biopac Acqknowledge

LOCK_TRANSPORT = True                # Lock the transport

NETWORK_SYNC_KEY = 't'               # Key to send event marker to Acqknowledge

NETWORK_SYNC_EVENT = 'triggerPress'  # Event trigger for marker

USE_NETWORK_EVENT = False            # Send network event to external app

NETWORK_START = False      # if True, use a network event to start (instead of START_END_SESSION_KEY)

# Network host/port and JSON event names (must match Unity/Unreal sender)

NETWORK_HOST = 'localhost'

NETWORK_PORT = 4950

NETWORK_START_EVENT_NAME = 'start_trial'

# ----- Data Recording -----

RECORD_VIDEO = True                  # Enable video recording

RECORD_VIDEO_OF_PLAYBACK = True      # Record during replay

RECORD_GAZE_MAT = True               # Save gaze matrix data

RECORD_FACE_TRACKER_DATA = False     # Save facial expression data

OLDER_SIGHTLAB_PID = False           # Use older participant ID format

# ----- Video Recording Method -----

# "OPENCV"           = Compressed videos (~50MB/min), may crash after ~10min

# "VIZARD_BUILT_IN"  = Uncompressed (~400MB/min), stable for hours, records Vizard window only

# "SIGHTLAB_BUILT_IN" = Vizard built in with compression - Can take some time to compress

# "IMAGEIO_FFMPEG"   = External window capture via imageio-ffmpeg, may crash after ~10min

SCREEN_RECORDER_TYPE = "IMAGEIO_FFMPEG"  

# ----- Video Quality Settings -----

VIDEO_RECORDING_WINDOW_HEIGHT_NEW = '1920'

VIDEO_RECORDING_WINDOW_WIDTH_NEW = '1080'

# ----- Timer & Session Control -----

USE_TIMER = True                     # Use timer instead of keypress to end trial

USE_TIMER_DROPDOWN = True            # Show dropdown to select timer length

DEFAULT_TIMER_LENGTH = 10            # Default timer length (seconds)

START_END_SESSION_KEY = ' '          # Spacebar to start/stop trial

PLAY_END_SOUND = True                # Play sound at end of trial

TRIAL_CONDITION = 'A'                # Default trial condition label

SET_NUMBER_OF_TRIALS = 1

# ============================================================================

# REAL-TIME STREAMING SETTINGS (During Recording)

# ============================================================================

REAL_TIME_STREAMING = True           # Show live window capture in VR during recording

# ----- Texture Alignment (if video appears offset) -----

# Use keyboard controls to adjust, then copy values here:

#   Arrow Keys: Move texture   |   Numpad 4/6/8/2: Scale texture

#   P: Print values  |  R: Reset to defaults

TEXTURE_OFFSET_X = 0.0               # Horizontal offset

TEXTURE_OFFSET_Y = 0.0               # Vertical offset  

TEXTURE_SCALE_X = 1.0                # Horizontal scale

TEXTURE_SCALE_Y = 1.0                # Vertical scale

TEXTURE_ADJUSTMENT_STEP = 0.05       # Adjustment increment per keypress

# ============================================================================

# REPLAY SETTINGS (During Playback)

# ============================================================================

HIDE_REPLAY_GUI = False              # Hide SightLab's replay GUI

FOLLOW_ON = True                     # Enable first-person view in replay

REPLAY_SECOND_GAZE_POINT_OFF = True  # Default True

override_screen_position = True      # Flag to control whether we override replay position

override_real_time_position = False  # Default False

# ----- Screen Position & Size -----

# Adjust these if the replay video appears misaligned or wrong size

# Use keyboard controls during replay to find perfect values:

#   Arrow Keys: Move  |  PgUp/PgDn: Depth  |  +/-: Width  |  [/]: Height

#   K: Print values  |  L: Reset  |  O: Toggle override

# ----- Viewpoint Adjustment -----

# Fine-tune camera position/rotation for optimal replay viewing

# ============================================================================

# PROFILE MAPPING AND PRESET CONFIGURATIONS

# ============================================================================

See the Config file for the full profile mapping list you can adjust

When to switch recorder typeVIZARD_BUILT_IN: rock‑solid for long runs (uncompressed, big files). • IMAGEIO_FFMPEG/OPENCV: smaller files, may be less stable after ~10 min. • SIGHTLAB_BUILT_IN: Vizard built‑in with compression.

Replay Controls (Highlights)

  • Toggle overlays: scan path, fixations, dwell spheres, heatmap
  • Follow camera: on by default for 360 media
  • Scrub: hotkeys B/N or C/V to step; drag slider to set time (video frame jumps follow hotkeys)
  • Record gaze video: 4 start / 5 stop → saves to /replay_recordings

Auto AI View Detection

Auto AI View Detection (Experimental)

  1. Record & Replay Use the recorder as normal → in replay press 4/5 to export a video with gaze (saved under /replay_recordings).
  2. Track ROIs (optional) Run **AOI_Tracker_Tool**:
  3. Space/P pause/resume · s select ROI (while paused) · Enter/Space confirm ROI · c/v step back/forward · q export
  4. Outputs: tracked_multiple.avi, tracked_boxes.csv, preview video to roi_videos_data.
  5. Extract frames Run convert video to images.py to generate frame_XXXX.png files.
  6. Analyze Run Auto_AI_ROI_View_Detection.py (or Auto_AI_View_Detection.py). Results saved as openai_response_<date_time>.txt; follow‑ups via Follow_Up_Questions.py.

Requires openai key:

Keys & Tokens Set API keys globally (Windows cmd): setx OPENAI_API_KEY "your-key"

Restart Vizard after setting. AI image analysis can be token‑heavy; consider sampling every N frames and using a dwell threshold (e.g., ≥15 frames at 30 fps ≈ 0.5 s).

Additional Extended Features

  • Rating/Likert Scales & Surveys
    Easily collect participant feedback. Customize scale labels and capture responses programmatically and in data exports. Ratings must be collected before or after the external session.
  • Inputs/Demographics
    Gather participant data (e.g., age, ID, gender) before starting the external session.
  • Adding a Label/Condition
    Tag sessions with experimental conditions for sorting and analysis.
  • Flags, Network Events, Button Clicks
    Enable logging of custom triggers (e.g., spacebar presses, network signals) during the session for synchronized event tracking.
  • External apps can send JSON UDP (e.g., {"event":"start_trial"} or {"event":"sync"}) to trigger local actions like syncEvent() or just be logged. Make sure the external app is sending UTF-8 JSON over UDP to the same NETWORK_HOST/NETWORK_PORT
  • Speech Recording (optional)
    Record microphone input for later analysis or transcription.
  • Transcriptions
    Combine mic recordings with post-session transcription tools to create searchable dialogue data.
  • Instructions
    Show instructions or display guidance on the mirrored desktop before launching the external app.
  • Plotly for Additional Data Analysis
    Replay session data with built-in Plotly tools to visualize gaze, movement, and behavioral metrics
  • Face Tracking and Expression Analysis
    Automatically capture facial expressions with supported headsets (e.g., Meta Quest Pro) if enabled in the config.
  • Average Physiological Data
    Biopac integration allows tracking and averaging of heart rate, skin conductance, and cognitive load throughout the session.
  • Baseline
    Record a short “resting” or neutral task before launching the external app to establish baseline physiological readings.
  • Biofeedback Ball
    Display a 3d object that responds to physiological data streams.
  • Lab Streaming Layer
    Connect to additional devices via Lab Streaming Layer.

Limitations and Tips

  • Can also use SteamVR to run the application and then use “Display VR View” to mirror the window and use that as the window to run the application on (Note: Don't use VR View for Real Time Streaming as it will override the view). This may be necessary for Meta Quest Pro and SteamVR
  • Replay has a screen that is in a weird looking aspect ratio or colors or off: Install K-lite codec pack from https://codecguide.com/download_kl.htm
  • May have weird results if headset eye tracking is not calibrated or head direction is off.
  • Face tracking data can be found in the data folder and visualized using the facial_expressions_over_time.py script.
  • Z‑depth caveat: Gaze point in external apps hits a screen‑space collider; Z accuracy is not object‑aware.
  • Headsets will not save head orientation (but will show in the replay with the virtual screen)
  • Note: For Vive Focus Vision and Vive Focus 3, need to use the SRAnipal driver instead of OpenXR. Download here (You don't need to run the Vive Console, just Vive Streaming, but the Vive Console software has to be installed to have access to the SRAnipal driver)
  • To verify that the eye tracker is working, recommend to run SightLab_VR.py first and then press 'p' to see your gaze point moving.
  • If running with SteamVR, minimize the SteamVR window first so that doesn't show on top of the video
  • The eye tracking may need to be first calibrated on the device, and then can also calibrate the replay screen by focusing on a point in the scene and moving the REPLAY_SCREEN_CALIBRATION using the arrow keys in the replay and pressing 'k' to print the numbers you can paste into the specific hardware profile you are using. You can also manually move the screen object in the resources folder.

FAQ

Where are my files? All sessions go under /data/<date>_<participant>/

Why does the replay look stretched/offset? Use replay hotkeys (arrows/pgup/pgdn/+/-) to dial in the screen; then copy printed values into the config

Can I start/stop with the network? Yes—enable NETWORK_START=True and match event names/host/port with your Unity/Unreal sender.

For more information about how you can use WorldViz tools for VR research contact sales@worldviz.com

For a demo of SightLab and Vizard click here.

Stay Updated
Subscribe to our monthly Newsletter
CONTACT US 
Phone +1 (888) 841-3416
Fax +1 (866) 226-7529
813 Reddick St
Santa Barbara, CA 93103