
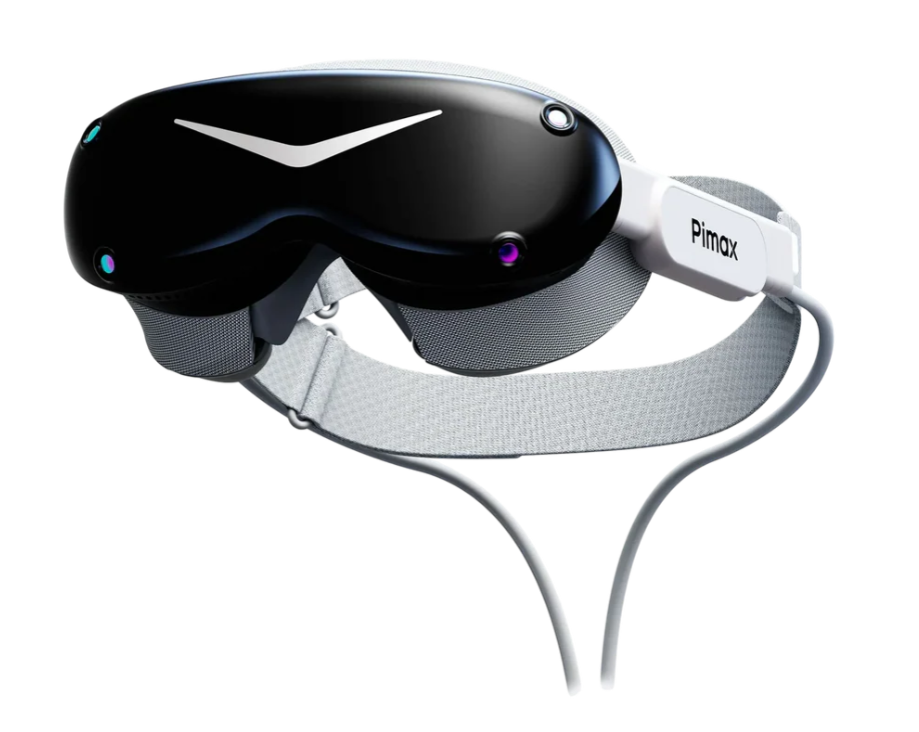
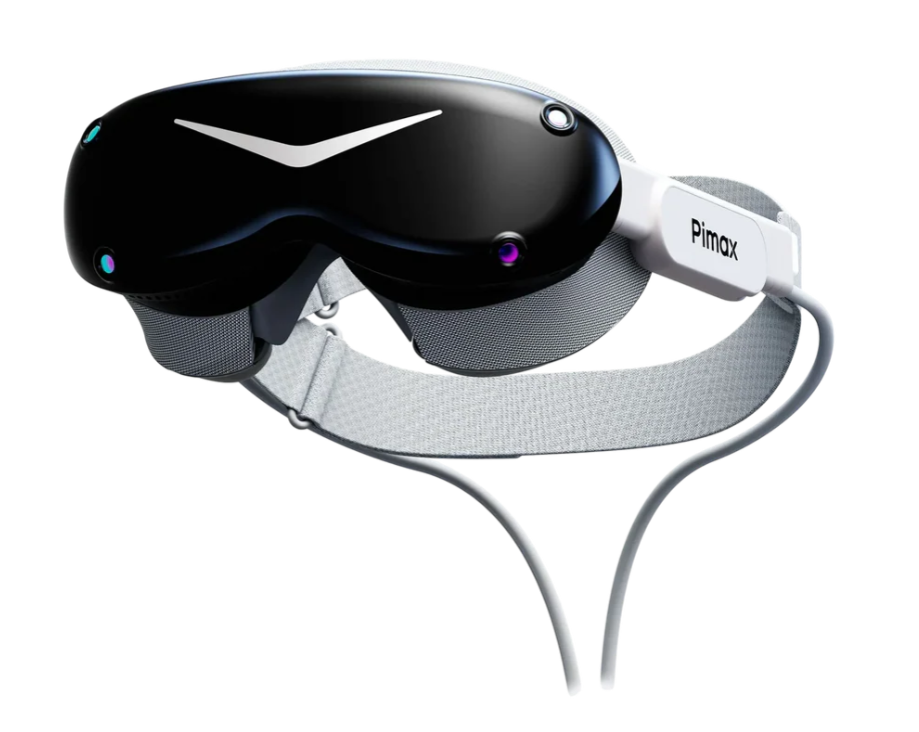
This Tech Tip explains how to set up the Pimax Dream Air for use with WorldViz Vizard and SightLab. The Pimax Dream Air is available in two tracking configurations: SLAM and Lighthouse. The correct setup path depends on which version of the headset you are using.
For Vizard and SightLab, the most important setup steps are:
The Pimax Play and PimaxEVO interfaces may look different, but the setup concepts are the same. The screenshots used in this guide show both Pimax Play Classic and PimaxEVO.
Additionally, you can see this setup video guide from Pimax here: https://www.youtube.com/watch?v=O4AImIz4phY
Important Note: If you have installed Vive Business Streaming, you must first uninstall it for the eye tracking to work with Pimax Play.
Plug the Pimax Dream Air into the computer using both required connections:
Also, plug the power cable into a wall power source
Open Pimax Play or PimaxEVO.
Confirm that the headset appears in the software as Pimax Dream Air before continuing.
If the headset is not detected, check that the DisplayPort cable is connected directly to the dedicated GPU and that the USB cable is connected to a USB 3.0 port.
The SLAM version uses inside-out tracking, so it does not require Lighthouse base stations.
Create the room boundary
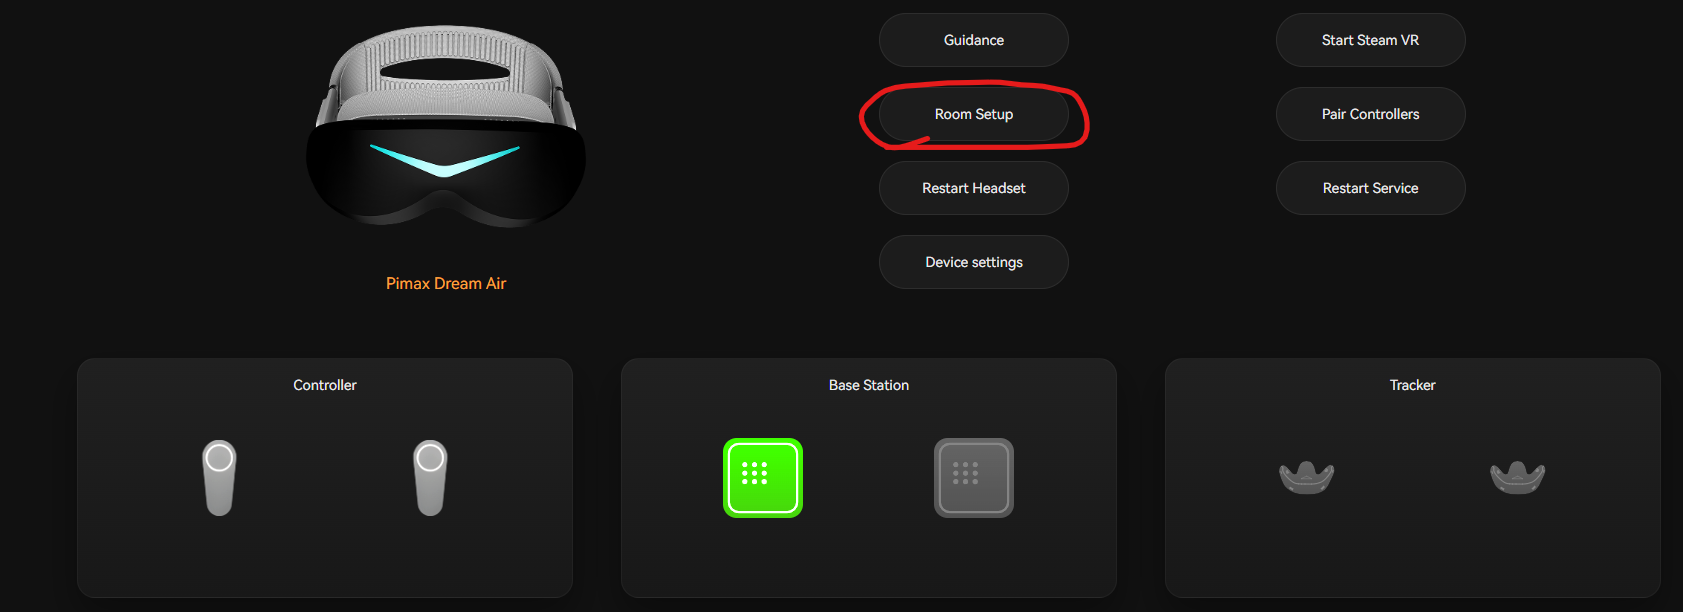
Open Pimax Play or PimaxEVO and select Room Setup.
In PimaxEVO, the setup guide starts with a room setup screen. Click Start Setup in the lower-right corner.
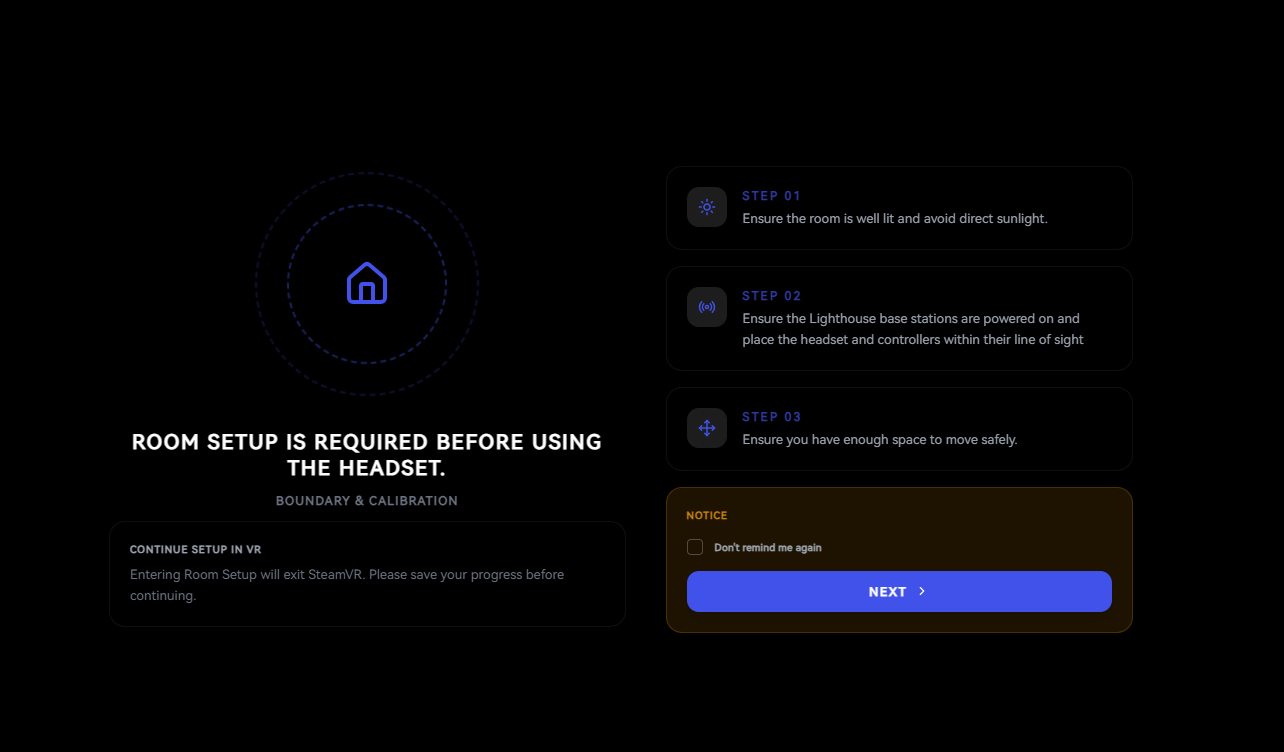
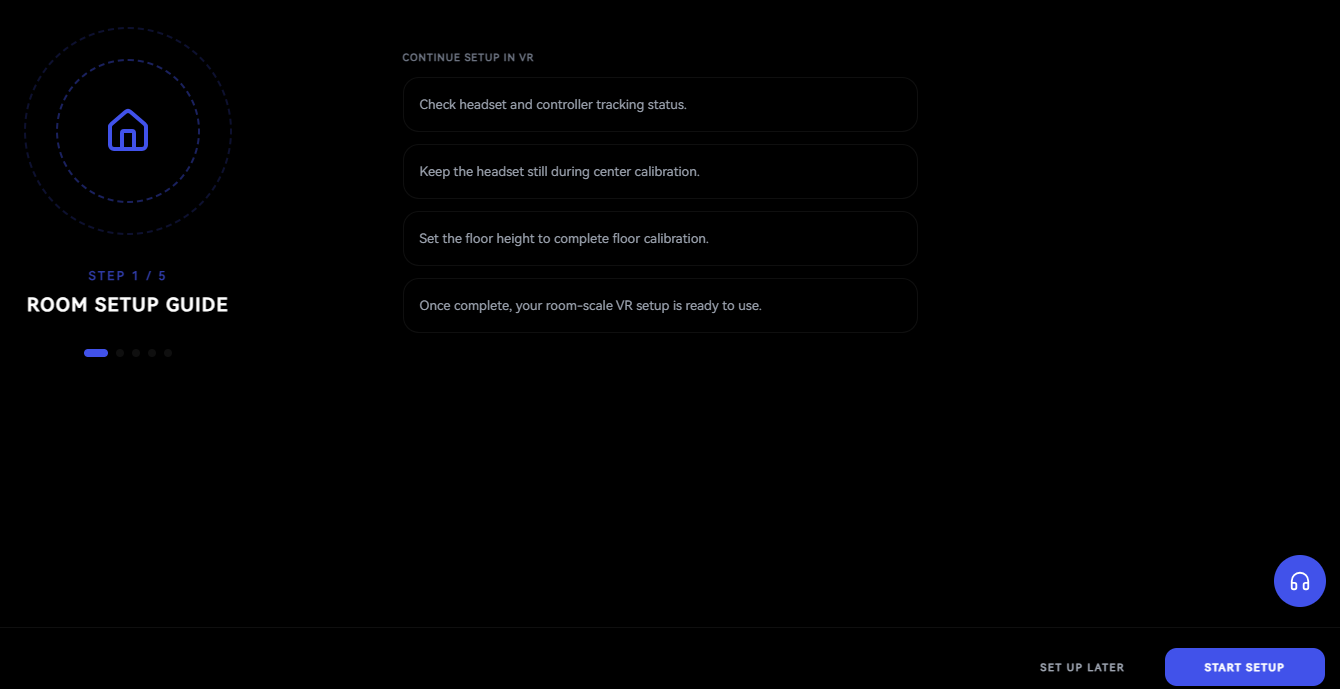
Follow the on-screen setup process to create the room boundary.
For SLAM tracking, make sure:
Once the boundary setup is complete, confirm that the headset is tracking correctly before launching Vizard or SightLab.
The SLAM version includes 6DoF controllers.
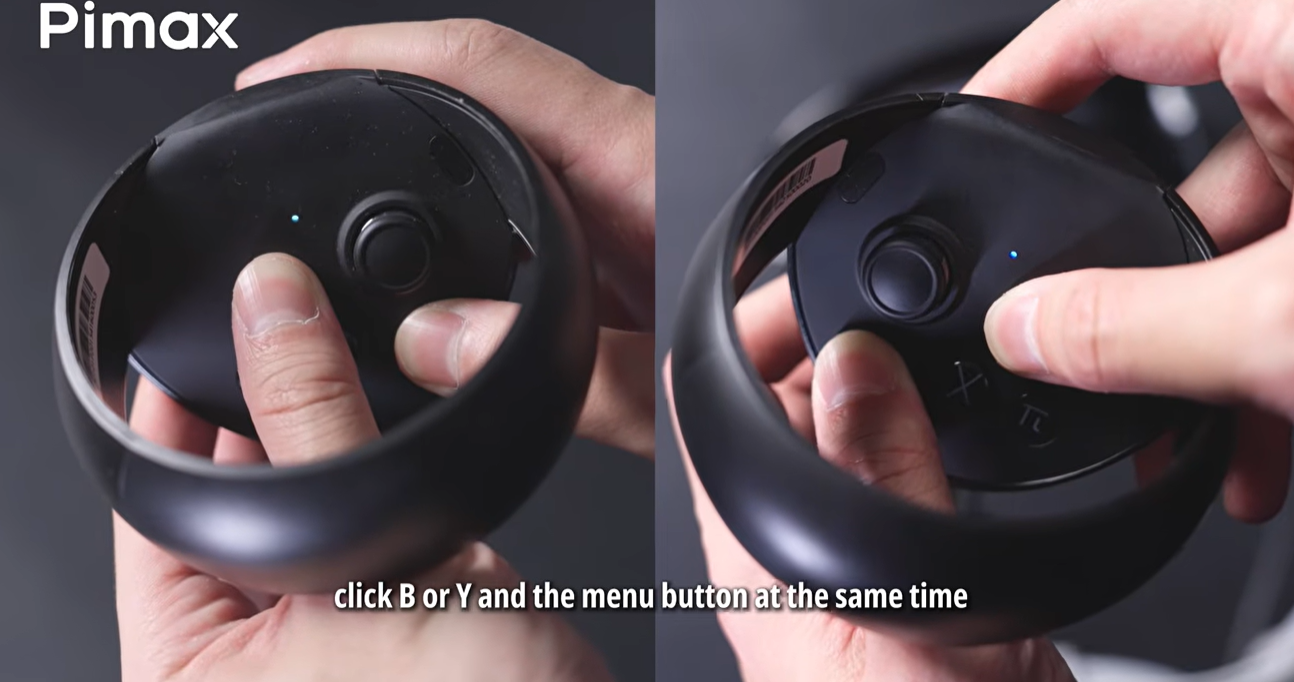
In Pimax Play, click Pair Controllers from the main device screen.
Make sure the controllers are charged, then turn them on.
For Pimax inside-out style controllers, enter pairing mode by holding the controller button combination shown in the Pimax pairing instructions. A typical Pimax controller pairing flow is:
After pairing, confirm that both controllers are visible in Pimax Play before opening SightLab.
The Lighthouse version uses external base stations and is designed for users who already have, or want to use, a Lighthouse tracking setup.
Before starting room setup, mount and power on the Lighthouse base stations.
For a typical room-scale setup, place two base stations in opposite corners of the play area, above head height, angled downward toward the center of the tracking space. Avoid reflective surfaces such as mirrors, glass doors, or glossy screens when possible, as they can interfere with Lighthouse tracking.
Open Pimax Play or PimaxEVO.
On the main Pimax Play screen, the base station status should appear in the device dashboard. A successful Lighthouse connection is shown when the base station icon is active/green.
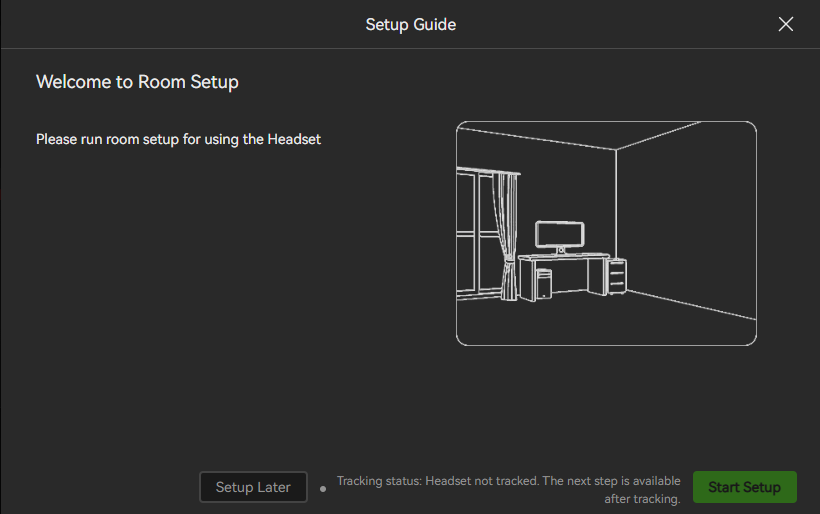
Click Room Setup.
If the headset is not visible to the base stations, the setup window may show Headset not tracked. Move the headset into the Lighthouse tracking area and wait until tracking becomes active.
In PimaxEVO, the tracking check screen should show Headset Tracked before you continue.
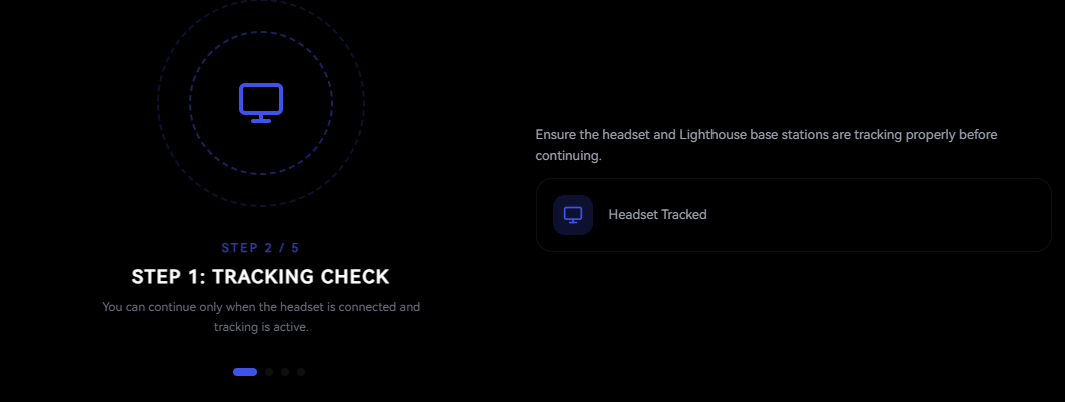
Click Next.
The next room setup step is center calibration.
Place the Pimax Dream Air in the center of the play area.
Face the headset in the direction that should be treated as the default forward direction in VR.
Keep the headset as still as possible.
Click Calibrate Center or start the center calibration step shown in the setup guide.
When the calibration finishes successfully, click Next.
This step is important because it determines the default forward direction for Vizard and SightLab scenes.
Next, calibrate the floor.
Place the Dream Air on the floor.
Enter 0 for the floor height.
Click Calibrate Floor or start the floor calibration step shown in the setup guide. You can also place it above the floor, but then need to measure the distance from the floor to the headset in centimeters.
When the calibration completes, click Next.
Room setup is now finished.
The Lighthouse version does not use the same controller setup as the SLAM version. It is intended for the SteamVR Lighthouse tracking ecosystem.
Compatible Lighthouse controllers may include options such as Valve Index controllers, Pimax Sword controllers, Vive controllers, or other supported SteamVR controllers.
Pair the controllers in the Pimax Play interface
If the controllers are not needed for the experiment, such as seated eye-tracking studies or gaze-only SightLab experiments, controller pairing can usually be skipped.
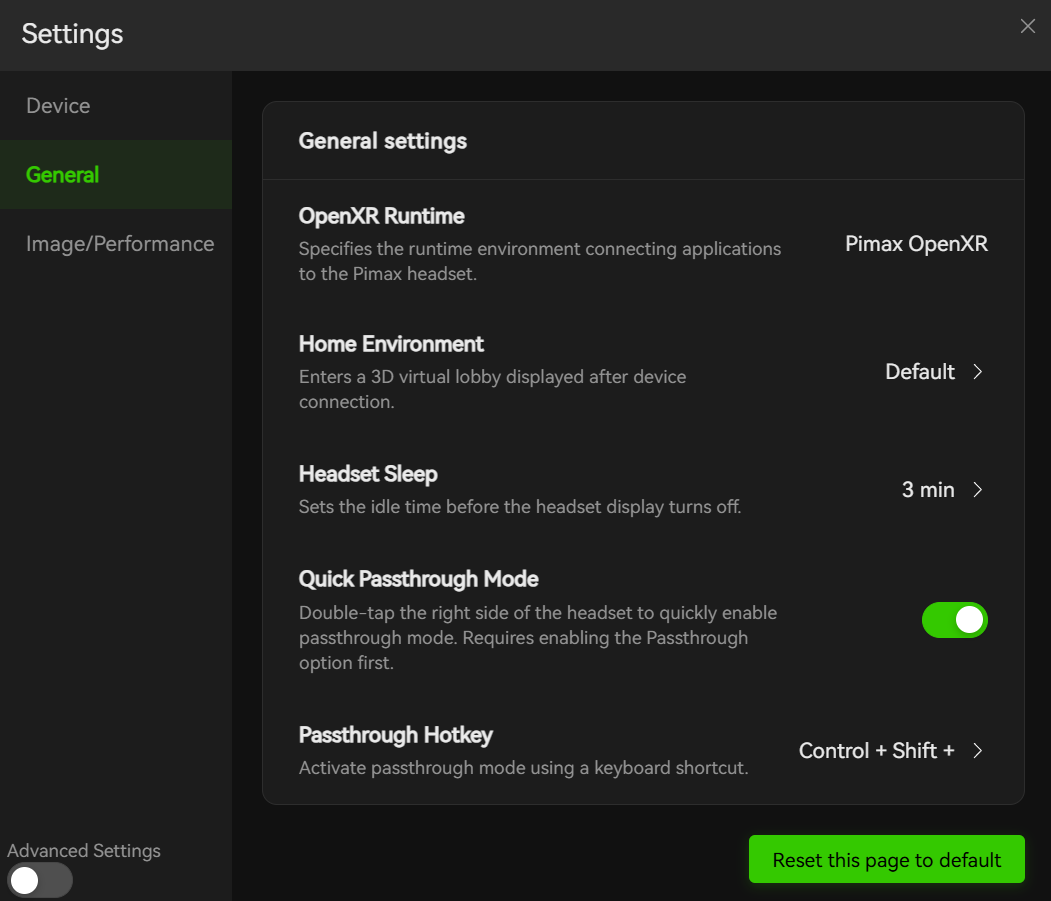
For Vizard and SightLab OpenXR use, set Pimax OpenXR as the active OpenXR runtime.
From the main Pimax Play screen, click Device Settings.
Go to the General tab.
Find OpenXR Runtime.
Set it to:
Pimax OpenXR
The General tab should show the current OpenXR runtime as Pimax OpenXR.
In PimaxEVO, the runtime selector is shown near the top of the interface. Select:
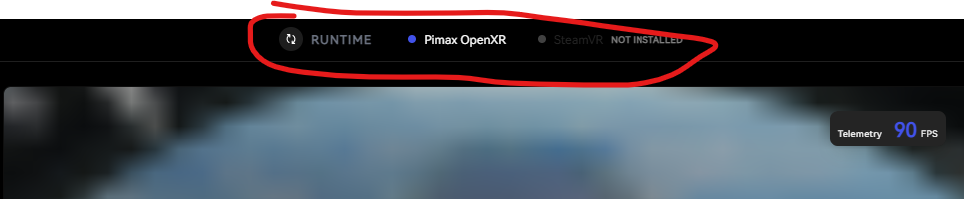
Pimax OpenXR
The PimaxEVO interface may also show other available runtimes, such as SteamVR OpenXR or Oculus OpenXR. For Vizard and SightLab OpenXR testing with the Dream Air, use Pimax OpenXR.
Only one OpenXR runtime should be active at a time.
For Vizard and SightLab OpenXR scripts, use Pimax OpenXR.
If you are intentionally running a SteamVR-based application or a SteamVR OpenXR workflow, make sure the SteamVR runtime is set correctly for that workflow. Avoid switching back and forth without checking the active runtime, because Vizard or SightLab may launch on the desktop instead of the headset if the wrong OpenXR runtime is active.
For most SightLab testing with the Pimax Dream Air, the recommended setting is:
Pimax Play / PimaxEVO > OpenXR Runtime > Pimax OpenXR
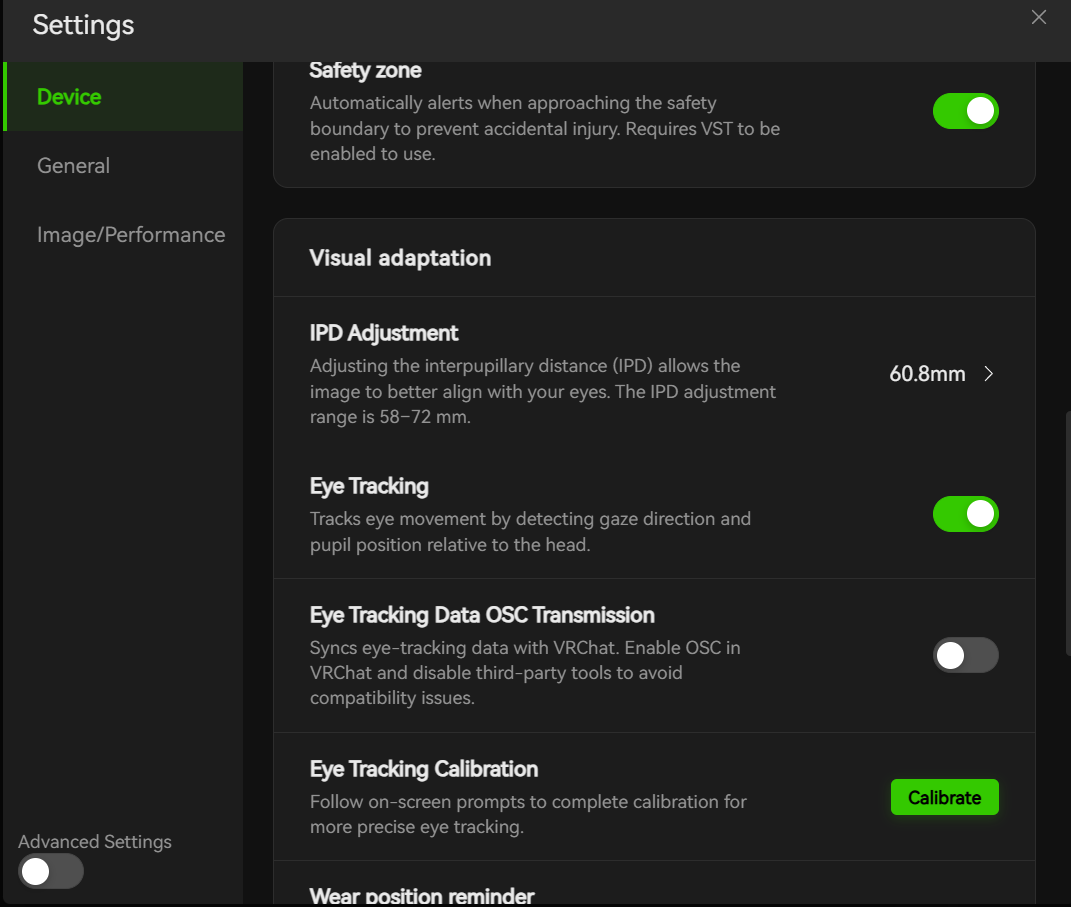
Before using eye tracking in SightLab, enable eye tracking in Pimax Play or PimaxEVO.
Click Device Settings.
Go to the Device tab.
Scroll down to Visual adaptation.
Turn on Eye Tracking.
The same section includes:
For Vizard and SightLab, Eye Tracking should be on.
The Eye Tracking Data OSC Transmission option is intended for OSC/VRChat workflows and is not required for normal SightLab eye-tracking use.
Open the Quality / Performance section.
Turn on Enable Eye Tracking.
Click Calibrate to begin eye-tracking calibration.
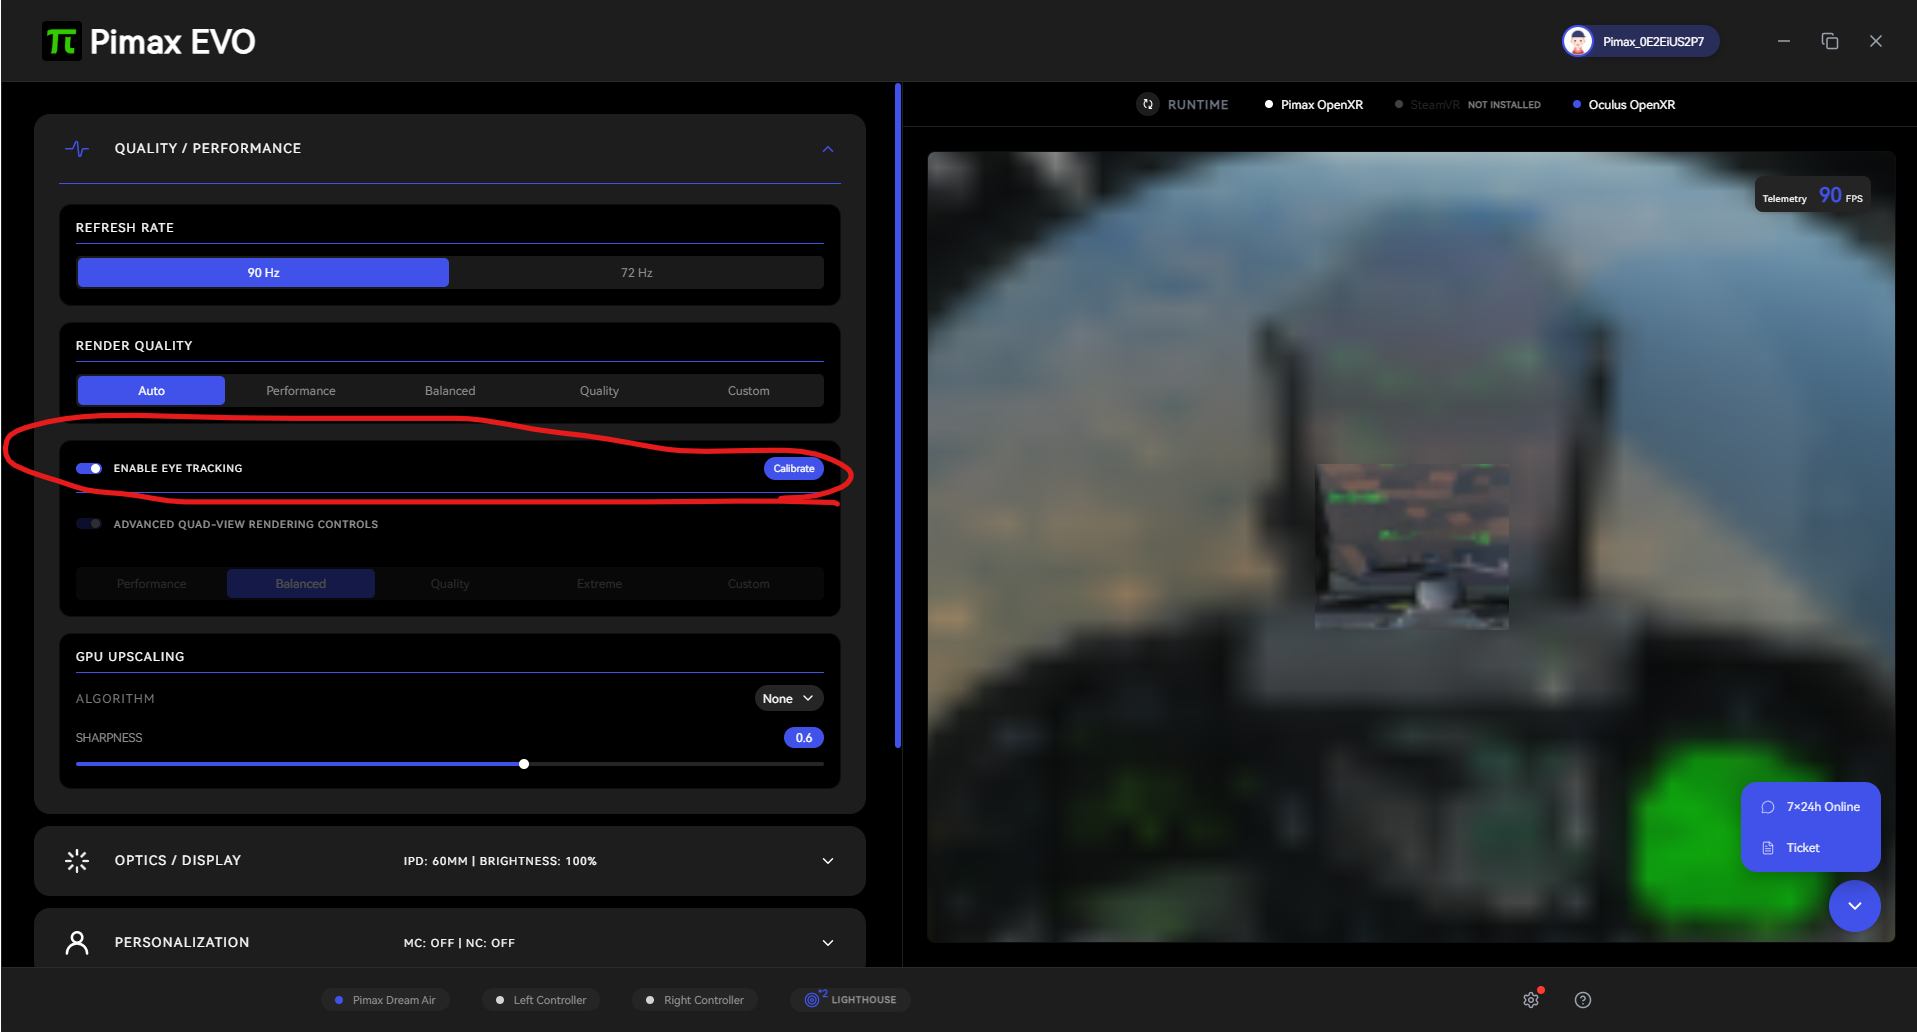
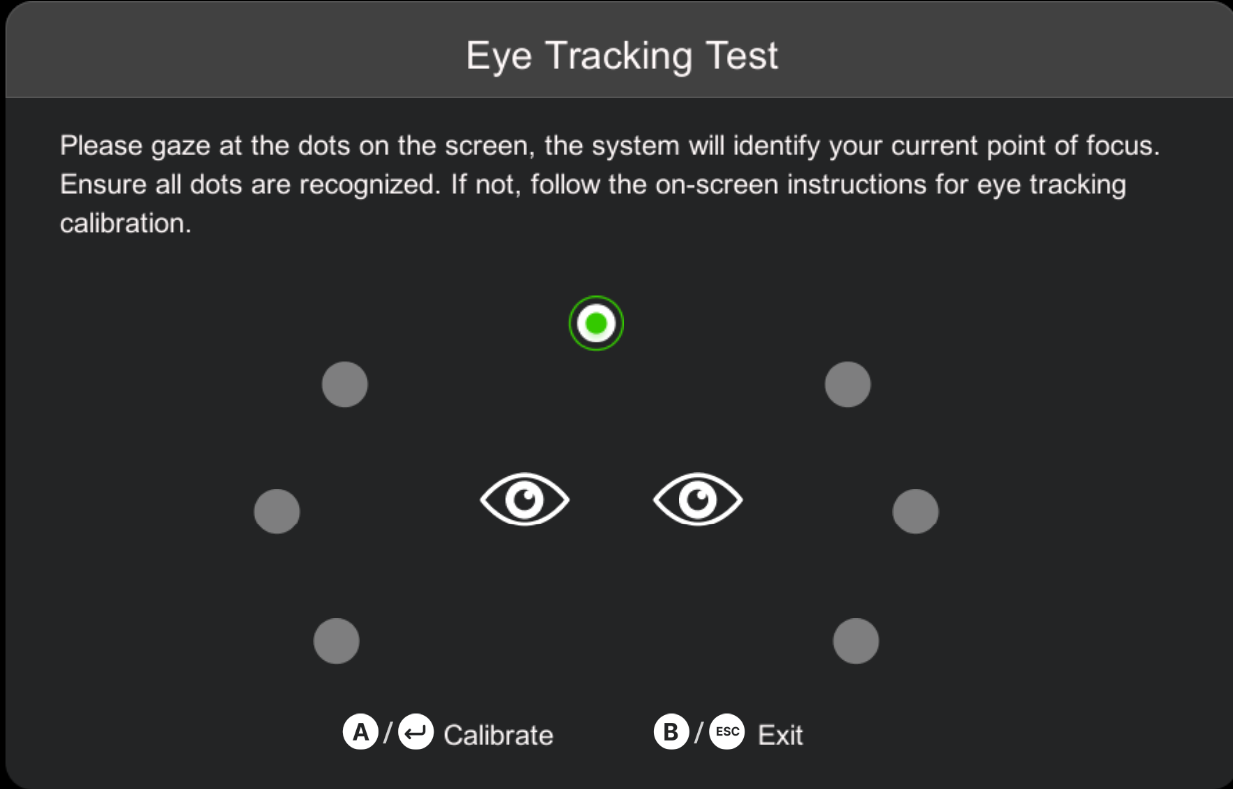
After enabling eye tracking, click Calibrate.
The Eye Tracking Test screen appears.
Press Enter to start calibration.
During calibration, follow the moving green dot with your eyes while keeping your head as still as possible.
When the calibration completes, exit the calibration screen and return to Pimax Play or PimaxEVO.
If calibration fails, restart the Dream Air and Pimax Play/PimaxEVO, then try again.
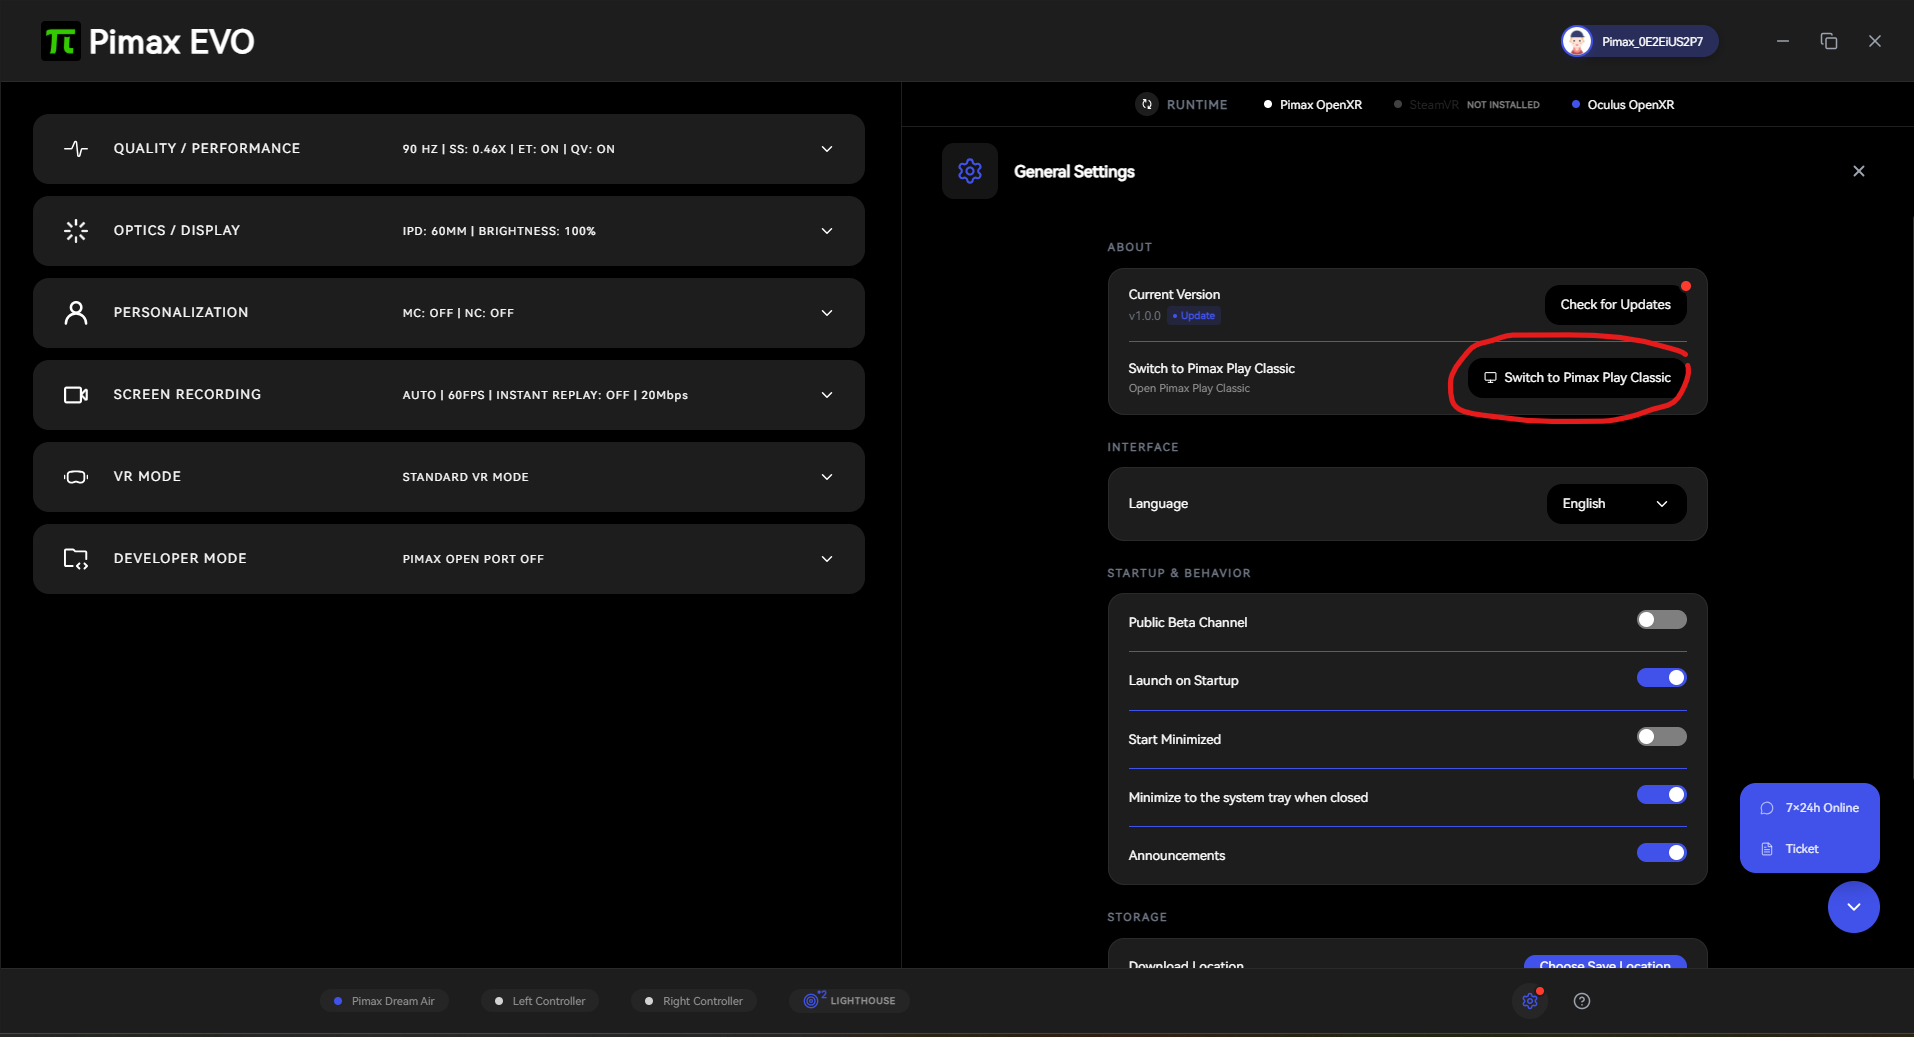
Some users may see either PimaxEVO or Pimax Play Classic depending on the installed version and selected interface.
Open the main Settings tab on the left side of Pimax Play.
Find Switch Window.
Select Pimax EVO.
Click Go.
Open the PimaxEVO General Settings panel.
Click Switch to Pimax Play Classic.
After switching, the software may prompt you to restart room setup. If room setup has already been completed and tracking is working, you can close the prompt and continue.
If the VR scene is facing the wrong direction, the most reliable fix is to do a Quick Calibration.
Press the Pimax button on the controllers:
Choose Quick Calibrate from the menu that pops up
After room setup, OpenXR setup, and eye-tracking calibration are complete, open Vizard and launch SightLab.
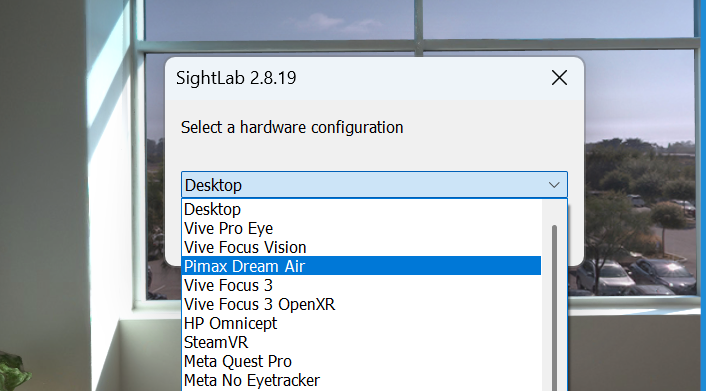
In SightLab, run your script, open the hardware dropdown and select:
Pimax Dream Air
Then run the SightLab script.
If the setup is correct, the SightLab scene should open in the Pimax Dream Air.
For eye-tracking experiments, confirm that eye tracking is enabled and calibrated in Pimax Play or PimaxEVO before running the SightLab experiment.
If you wear glasses there is also the option to purchase optic inserts from Pimax here:
Check the USB 3.0 and DisplayPort connections.
Make sure DisplayPort is connected directly to the dedicated GPU.
Restart Pimax Play or PimaxEVO.
If needed, click Restart Headset or Restart Service from the Pimax Play main screen.
Make sure the room is well lit.
Avoid direct sunlight into the headset cameras.
Make sure the cameras have a clear view of the room.
Restart the headset if tracking does not recover.
Make sure the base stations are powered on.
Move the headset into the base station tracking area.
Confirm that the base station icon is active/green in Pimax Play.
If using multiple base stations, make sure they are mounted correctly and are not blocked.
Check the active OpenXR runtime.
For Vizard and SightLab OpenXR use, set the runtime to:
Pimax OpenXR
Then restart Pimax Play/PimaxEVO and run the script again.
Confirm that Eye Tracking is enabled in Pimax Play or PimaxEVO.
Run eye-tracking calibration again.
Restart the headset and Pimax software if calibration or tracking fails.
If eye tracking still does not work, check Windows Device Manager for the Pimax/Tobii eye-tracking device and confirm that the related Pimax and Tobii services are running.
For SLAM controllers, click Pair Controllers in Pimax Play and repeat the pairing process.
For Lighthouse controllers, pair them through SteamVR.
Make sure the controllers are charged and inside the tracking area.
To use the Pimax Dream Air with Vizard and SightLab, first complete the correct tracking setup for the headset version.
For the SLAM version, create the room boundary in Pimax Play or PimaxEVO and pair the included controllers if needed.
For the Lighthouse version, power on the base stations, confirm that the headset is tracked, complete center and floor calibration, and pair compatible SteamVR controllers if needed.
After tracking is working, set Pimax OpenXR as the active OpenXR runtime, enable and calibrate eye tracking, then open SightLab and select Pimax Dream Air from the hardware dropdown.
Once these steps are complete, the Pimax Dream Air can be used with SightLab and Vizard for VR experiments, eye-tracking studies, and OpenXR-based applications.
For more information on SightLab and to request a quote click here:
https://www.worldviz.com/request-sightlab-demo.
Or contact sales@worldviz.com.